From the very first day, the front yard of La Casa Fickbonne has been less a yard and more a lesson in erosion. The only flat patch is to the side of the garden gate, which we naturally turned into a garden bed for the corn. (Some see “flat patch of yard,” I see “just enough room to fit another garden bed.”) Other than that it is a steep slope of dirt and weeds steadily sliding onto the sidewalk with every rainstorm.

Or at least it was.
Planting grass on the slope was out of the question. We live in a desert and we get charged for water. Grass is notoriously greedy for water. So we thought a retaining wall was the best way to go. After getting our first estimates of $4,000+… we decided to table the idea.
Then we fell head over heels in love with our landscape designer, Eryn Murphy. Her expertise is in using native plants and intuitive design to build landscaping that is sustainable, drought-resistant, and friendly to local fauna and pollinators. We started working with her two years ago on our backyard, and last summer we had her help us with the dreaded front yard slope.
The thing with landscaping is that you kind of have to let it mature to get results. Which is why the last two years I haven’t really shared any landscaping pictures here on the ole’ house blog. But I was cleaning up some fallen leaves and trimming our native grasses the other day and saw that all the lovely native plants Eryn helped us plant last year are popping up from their winter slumber! So I decided today’s the day to explain how we handled the dreaded front yard slope.
First things first, Eryn crafted a design for us that would incorporate water sources (i.e., gutters that drain onto the slope), blooming schedules (so everything doesn’t bloom all at once and then chill so our slope has a little color all summer long), and shade (the slope faces East).

We prepped the slope by ripping out as many of the weeds as possible and scattering some fresh homemade compost (of which we have gallons because I am obsessed with composting). We wanted a little bit of retention at the bottom of the slope to protect from erosion while the plants grew their roots, and also to give us a straight edge in the winter for shoveling against. So we used some old fence posts from our last fence repair to mark the edge of the sidewalk.
Then on The Hottest Day of the Year (or so it felt), we started digging holes and planting plantlings. Eryn had supplied us with tons of young asters, penstemon, rabbit brush, flax, grama, sideoats, sundrops, sage, winecups, pussytoes, and more. We tried to stick to her design, but toward the end we got slightly lazy and hot and just called some audibles on plant placement.
I laid down some insulating mulch to help with water retention and overall prettiness. Then we strategically placed a bunch of landscaping boulders I got for free on Craigslist. Note: people give away very heavy things for free all the time. You just have to be able to move them yourself. Thanks random Craigslist guy who let me drive into his backyard to collect all these boulders!
Aaaaaand then it snowed. Because Colorado. We lost maybe 30% of the young plants despite our efforts to cover the slope and insulate them. After that devastating blow, though, the plants took off! Here’s how one side of the slope looked at the end of summer when the plants had reached full maturity:

Pretty, right? And this year they’ll likely be even bigger now that they’ve had a whole year in the ground to grow their root systems and propagate. I specifically didn’t put down any landscaping fabric below the mulch because I need them to spread as much as possible. The bigger the plants’ root systems, the more erosion-proof the dreaded front yard slope.

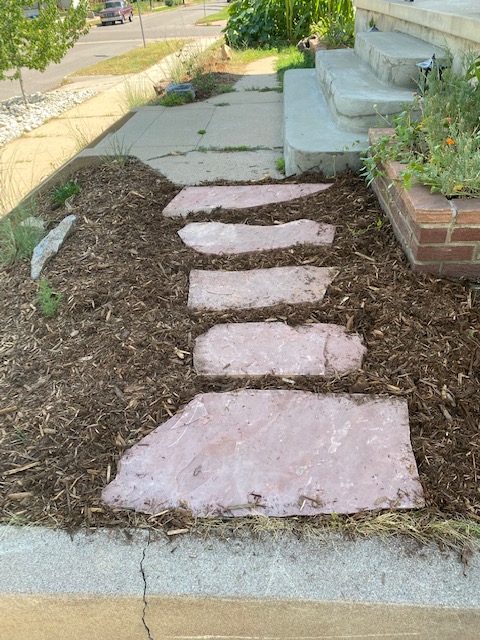
To finish it all off, I placed some sandstone pavers at the top of the slope to lead from the front steps to my car. Since I regularly cut across that space anyway, I figured I’d make the path official.
Writing this post was my way of getting excited about gardening season. We’re SO CLOSE, but as it literally just snowed this morning (because Colorado), I’m going to have to resist for a few more weeks. I’ll post an update of all our native plants later this year when they’re all in bloom and surrounded by the buzzing of our honeybees and native pollinators. For now, I shall leave you with last year’s mini poppies… which were poppin’.


