The Symbolic Table of Generational Bonding

Standard

Ever since we moved into the Casa Fickbonne I have longed for a nice long farmhouse table at which I could seat and feed my legions of dirtbag friends. As our dear friend the Reverend Chad says, Mr. Fickbonne and I are the Mayors of the Island of Misfit Toys, and due to my instinctual Italian need to nurture and fatten, I find myself feeding our Misfit Toys all the time.

How embarrassing it is to feed them on a pair of secondhand, mismatched, wobbly picnic tables under the awning in the backyard! Oh how I longed for a more suitable, grander, more auspicious outdoor dining solution!

DSC_0876

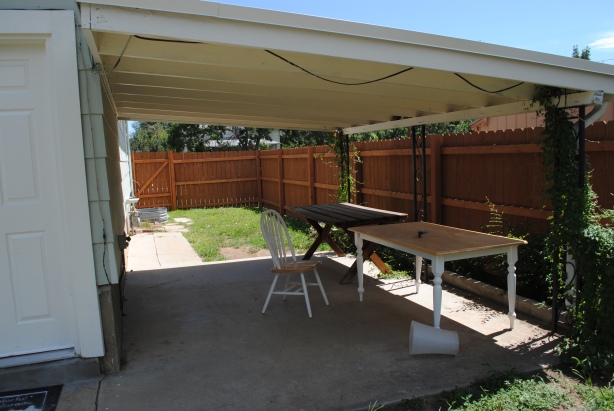
Covered… porch? I dunno man.

Oh Daaaaaa-aaaaad!

When my parents started planning a summer visit, I had a plan. My dad loves carpentry, to the point that he has built himself the world’s greatest wood shop, where he painstakingly curates all the most perfect tools and creates feats of crafty wonder. What better way to spend quality time with him than to build something together while he visited? What better way to selfishly assure I would end up with a decent, one-of-a-kind, built-to-order farmhouse table than to enlist the help of my dear father?

And so he gracious agreed to help me build the damn thing.

We used plans from Ana White, my favorite woodworking bloggess. I knew I wanted to be able to seat 10-12 people, so we extended these plans for her pocket-hole farmhouse table by two feet.

Using Mr. Fickbonne’s truck (have I mentioned recently how useful it is to have a big truck?), we got our lumber from Front Range Lumber… as they were the only ones open on a Saturday but also they were really nice and helpful.

And then we began to build!

20180811_190302

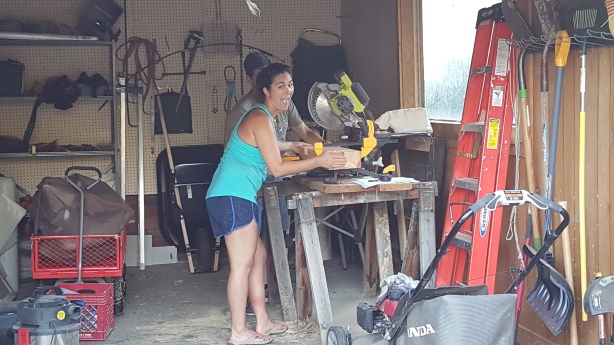
You know I can’t resist an opportunity to strike a pose.

The nice thing about building a thing with my dad is that he is just as neurotic about safety as I am. As evidenced by my many mysterious scrapes and bruises (Where did they come from? Hell if I know.) and hideous burn scar on my right arm, I am what society calls “accident-prone.” So yeah, it’s probably a damn good idea to unplug the miter saw in between each cut.

We made three mistakes whilst building:

  1. The stop on the miter saw shifted and I almost sawed all the way through a board that I was only supposed to saw halfway through. We fixed it with a few shims, some sawdust, and wood glue. And in the process, I learned a valuable mistake-fixing technique! Can’t you feel the wisdom being passed down a generation???
  2. One side of the frame fell over and a board broke while we were building it. My bad! Fortunately, we ordered an extra plank, so all was well.
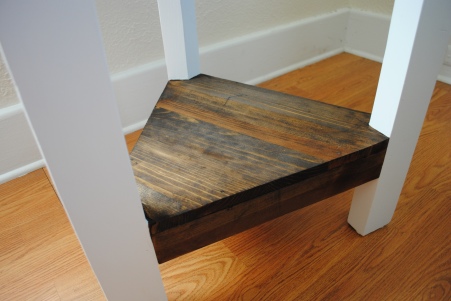
  3. The one time—ONE TIME!—Mr. Fickbonne and my dad were working on the table without my direct involvement and supervision, they stuck with the measurements on the plans rather than measuring what we had built. The result was that the breadboard ends of the table were cut about two inches too short. I will give them credit for coming up with a solution that was both cute and practical. They cut one-inch endcaps for the breadboards that can be sanded down or removed as the lengthwise planks of the tabletop shrink over time. So, while it was a grievous error, it actually resulted in some pretty crafty ingenuity.

We used a kreg jig to connect everything with pocket holes. I had never used a kreg jig before, and borrowed one from my friend Craig (yes, we used Craig’s kreg). Dad assured me that pocket holes were super easy and would lead to a stronger construction of the table. Which just goes to show that I am a sucker for elderly guile because it was only after we were done that he admitted he’d never made pocket holes before. YOU WIN THIS ROUND, PADRE.

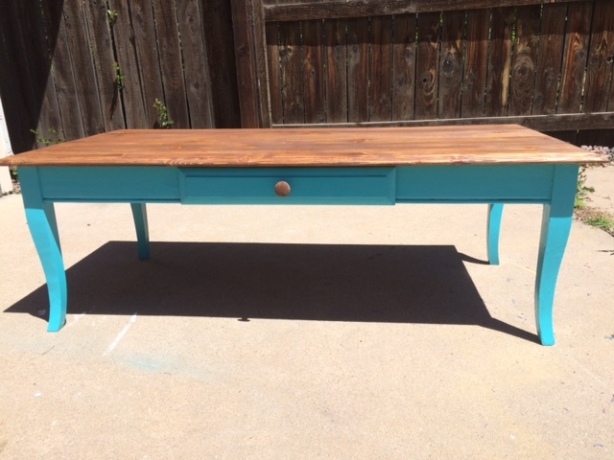
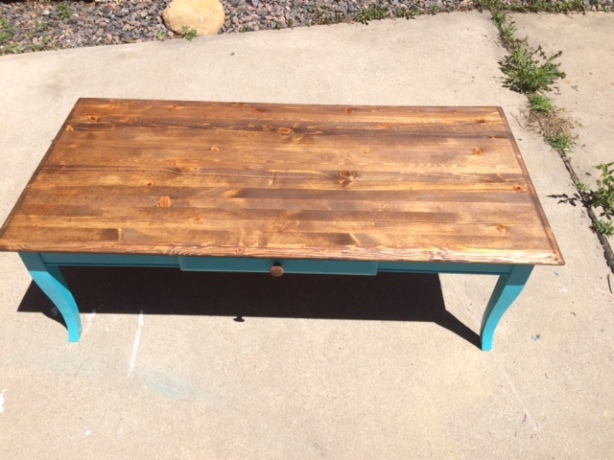
After much planing and sanding, we had our inaugural dinner on the table with some of our closest friends while my parents were in town. And then it was time for the parental units to head home. The table of generational bonding was complete!

image2 copy 3.jpeg

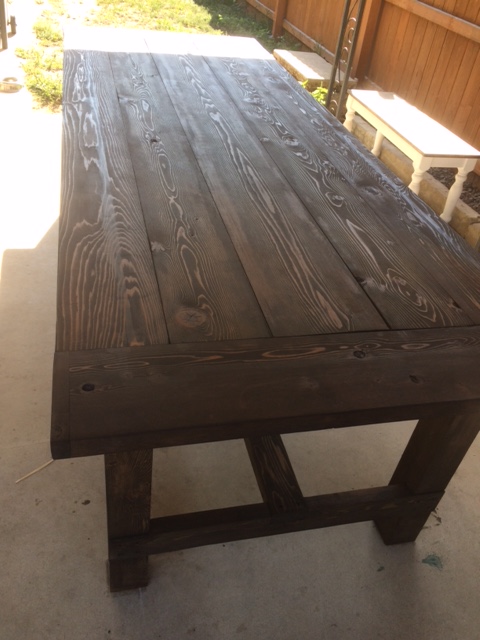
Isn’t it gorgeous? I used Minwax Jacobean to stain it and an oil-based outdoor polyurathane to seal it. I might lightly sand it and apply a few more coats of the sealer, but for now it’s ready for daily use.

I also installed a few brackets to stabilize things underneath. Can’t be too careful! After all, this table is to be used by a legion of Misfit Toys and lord knows what they’ll do to it.

While asking my dad to work in the hot, August sun might count to some as elder abuse, I’m so glad he agreed to build this spectacular table with me. Not only did I benefit from his superior knowledge of carpentry (as God is my witness, this is the most MATHEMATICALLY CORRECT table the world has ever seen), but I got to spend time with both my parents. There’s something special about creating something you’ll use for years with one’s parent. I’m proud of what we built, and I shall look back fondly upon the building process knowing that it was something I got to do with my dad.

Go go gadget… garage window!

Standard

The Garage of Wonders, while generally wonderful, leaves a lot to be desired, aesthetically speaking. It’s basically a garage someone built a lean-to on decades ago. The electricity no longer works, one of the two up-sliding garage doors only latches when you slam it with the force of frustration after twenty attempts, and the lean-to side is kinda dim.

So I says to myself I says, “I can’t do much about the electricity or the door right now, but I can definitely help with the last one!

One of the window holes was boarded up when we moved in. For reference, here’s how the garage looked when we bought the house:

DSC_0877

YOU GUYS. WE HAVE A FUNCTIONAL GARAGE.

So the window I’m talking about is the far-left one, which you can see a little better in this shot from after we had the house and garage painted (thanks again, insurance settlement):

DSC_1363

Fortunately for me, I had an extra window. For when someone built the second half of the garage, they didn’t remove the exterior windows that were now in a wall between the two halves of the garage.

window3

So I got my trusty hammer and screwdriver and set about removing the interior window from its frame. Then using my miter saw and some eyeball measurements, I trimmed about an inch off to fit it into the exterior wall.

Removing the boards from the hole where the window would go was pretty simple.

And then it was just a matter of screwing the former interior window into place in the exterior wall!

window5.jpeg

As you can see I still need to paint the window to match the rest of our freshly painted trim. But all-told, this project took maybe thirty minutes, cost zero dollars, and improved the lighting situation in the garage. So I’m calling that a win!

Also Mr. Fickbonne didn’t notice for days. I had to point my hard work out to him. So now he’s in trouble.

How long before this counts as an official hobby?

Standard

Editor’s note: I wrote this last fall and didn’t get around to uploading the pictures and publishing it until now. Mea culpa. Enjoy this blast from the past!

So I’ve decided I really love refinishing furniture. Specifically, I love finding a piece in the alley, seeing what spare supplies I have in the Garage of Wonders, and then fixing it up entirely for free. If I can sell it on Craigslist for a profit? Even better!

Here’s a table I recently did up for my friend Dustin:

DSC_1350

I literally found this bulky wooden thing in the alley under a pile of the neighbors’ trash. I already had the sander, stain, paint, and polyurethane to make it the perfect outdoor table for Dustin’s porch. All told, it was maybe three hours of work, not including time spent waiting for it to dry. It looks much more sophisticated as a two-toned accent table than it did as an unfinished scrap wood table.

DSC_1352.JPG

I never intended to keep it for myself, so I’m just glad a friend saw it, loved it, and had the perfect use for it. And in the meantime I got to work with my hands on a sunny day outside.

Then there’s the little cabinet my neighbors put outside on the curb with a “free” sign on it. First it looked like this:

And then I made it look like this:

cabinet3.jpeg

I sanded and re-stained the top and spray painted the body. Then I used more stain to give the yellow parts that antique look. I think the only real cost to this one was buying new knobs, which cost me a few dollars at Home Depot. I didn’t bother painting the inside of the cabinet because… why?

I plan to sell this one eventually, but at the moment it serves as a bookshelf and printer cabinet in my home office. I’d like to find something a little better for the space, but until I do, my little yellow cabinet is doing just fine.

Next in line? This coffee table that was clearly one of my neighbors’ children’s craft tables for many years. It took me forever to sand all the glitter and stickers off of it. God help me, but it wasn’t until weeks later that I found out about more speedy and efficient methods of getting old paint off of wood.

table1.jpeg

Once I refinished it, I also needed to add some stabilizing hardware. Being the creative outlet for tiny humans for several years has left it less steady and level than typically desired of a coffee table. I also spray-painted the legs electric blue and stained the surface a nice nutty brown. I sold it to a friend who just moved into her first apartment and needed something to tie the room together. Now it looks like this:

table3.jpegtable2.jpeg

Now my call to arms: do YOU have a piece of shitty wooden furniture you’d like to get rid of? Do you have one you want to fix up but you don’t have the tools or the know-how? GIVE IT TO ME. I will breathe new life into its dusty, unfashionable bones.